How to practice
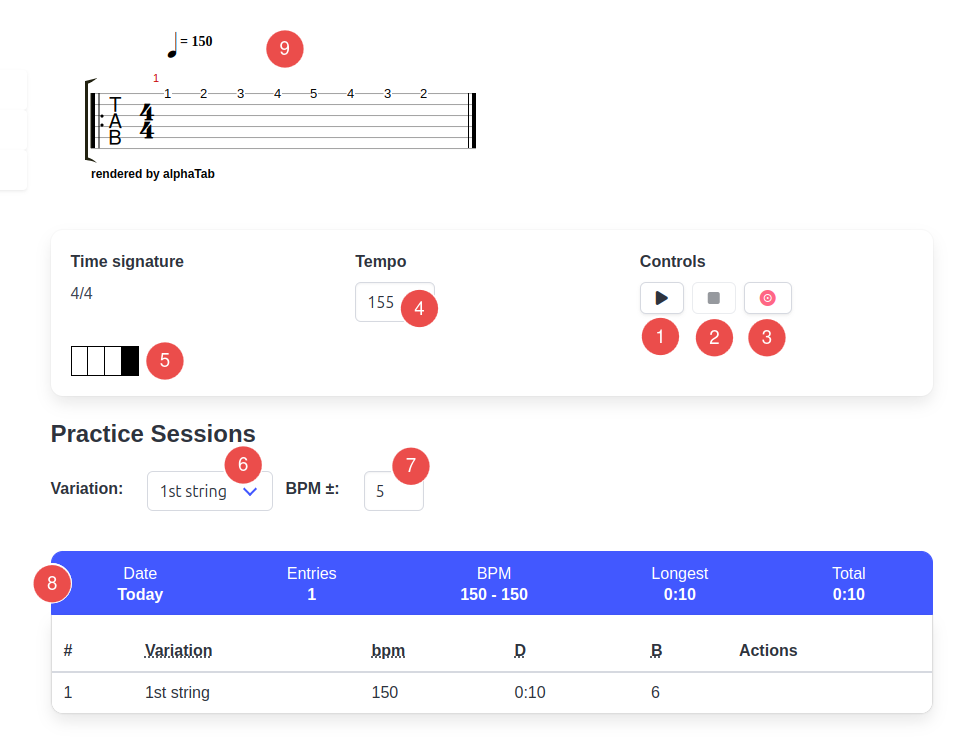
The following image highlights the different components that you see on the practice page. Each of them are explained in detail below.
1 |
Play button to start the metronome. Will be disabled when the metronome is playing. Keyboard shortcut: Press |
2 |
Stop button to stop the metronome. Will be disabled when the metronome is not playing. Stopping the metronome will result in practice sessions getting captured when the capture or record mode is enabled (see point 3)
Keyboard shortcuts: Press |
3 |
Capture/Record button to toggle capture mode. Practice entries will be captured only when it's toggled on. This allows you to use the metronome without capturing any entries. The button appears in green color when it's toggled off and in red when it's on. Capture mode is OFF Capture mode is ON
Keyboard shortcut: Press capital |
4 |
Tempo in beats per minute (bpm). By default it shows the target tempo for the exercise. A common strategy is to start at 50% or 60% of the target tempo and gradually increase it. |
5 |
Visual cue for the metronome. It will align with the time signature. |
6 |
A dropdown to select the Variation |
7 |
BPM delta can be specified to automatically increase (or decrease) the tempo every time the metronome is stopped and started again. Handy for gradually practicing at increasing speeds. Negative values are also supported. |
8 |
A table where the captured practice entries are listed. Entries are grouped by days (each day is considered a "practice session") and a summary of a practice session also displayed. |
9 |
Tablature can be optionally added for the exercise using the alphaTex notation. Note that the tablature is purely for reference i.e. so you know what you are practicing. Unlike tools such as Guitar Pro, there's no MIDI player/editor. The focus is not on helping you learn a piece of music, but to help you practice it. |